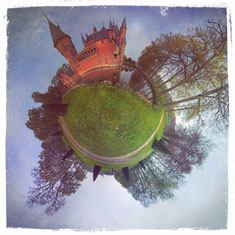
Little Planets
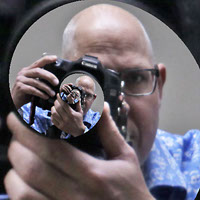
Little Planets by Ronald den Bekker
Ronald den Bekker is a teacher at SintLucas Eindhoven. He serves lessons in the Adobe software packages InDesign, Photoshop and Illustrator. Since 2010, he specializes in creating interactive tablet publications with Adobe Digital Publishing Suite.
In his spare time he is involved with photography and in particular with panoramic photography. The panoramic pictures are made by a special process and then processed into so-called "little planets".
Below you can read how a Little Planet is created.
How to make a 360 degree picture
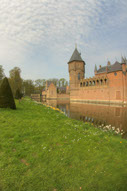
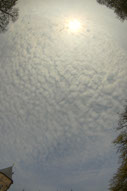
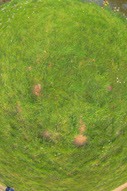
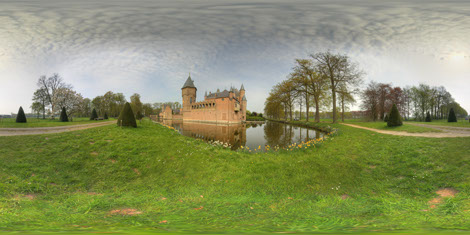
A 360 degree photo is a panorama at which is photographed completely around. So in one photo you can see the whole surrounding area. There are two variations of this type of images, a simple 360 degree panoramic photo and a full 360 degree photo. In a full 360 degree picture you can look to the left and to the right, but also look up and down (360 x 180). For the making of a Little Planet a 360 x 180, a so-called equirectangular, is necessary. .
Nodal point
To create a perfect 360 degree photo you have to find the so called Nodal point. This is the point where the light rays intersect in the lens. For panoramic shots without the so-called parallax error you have make the camera rotate exactly on this point while making your panoramas. This can not be done without the use of a panoramic head, such as for example the NodalNinja.
If you have a camera to rotate on the Nodal Point, an object near the camera remains in the same place relative to its background no matter how the camera rotates. If you don’t make the camers rotate on it’s Nodal Point, the foreground will move compared to the background. If you stitch multiple photos together, there appears an error on these spots in the panorama, the parallax error.
.
Equipment & Settings
In theory, a 360 degree panorama picture can be made with any type of lens. However, it is wise to choose the largest angle lens you have available. The wider the lens, the fewer photos you need to make. You might use a fish-eye lens, 3-5 photos can already be enough, however, when you use a 200mm lens, you will probably need hundreds of photos to get a 360 degree panorama.
For a good transition between photos in a 360 degree panorama you must ensure that the settings used on each photo are exactly the same. So put everything possible to manual. Select a lowest possible ISO value, set your aperture to f/8.0 or smaller (higher aperture number) to ensure that most of your image is sharp.
Now turn your camera around to measure the light at various places in your panorama. This works best with your camera in aperture priority and to read the appropriate shutter speed while you're turning around with your camera. Press the shutter button halfway to see the shutter speed, then release the shutter button and measure the ambient light a little further. After that, take just about the average of what you have measured. Keep any peaks (very dark and very light areas) beyond your average value. Set your camera to manual now and set the newly defined shutter speed and the previously selected aperture.
To prevent color differences in your photos you need to adjust the white balance of your camera manually. Select the value that fits the situation where you are, for example set the white balance to cloudy when it is a cloudy day and you are in the open air
Checklist 360 degree photos
1. Select the light sensitivity of your sensor
2. Select the desired aperture
3. Measure the average available light
4. Select the desired shutter speed
5. Set the white balance to the correct setting (no auto WB)
6. Focus once and turn the autofocus off
7. Provide a minimum overlap of 20% per photo
Finishing
After shooting, the photos are digitally edited. After the tripod in the pictures is retouched, the photos are stitched together into one equirectangular.
This equirectangular can then be edited with Photoshop to a Little Planet.

RONALD DEN BEKKER • LITTLE PLANETS • info@littleplanets.nl